

Burberry has really gone and done it this year. Their makeup look for their Autumn Winter 15 show was absolutely stunning, and I have been obsessing over it ever since I saw it. A sultry smoky eye, with natural brows and warmed up, glowy skin, this look is equal parts sexy, sultry and smudgy glamour, and is also infinitely wearable.
There is something so sophisticated and sexy about the iconic Burberry trench coat that has always captured my imagination. For me I think it symbolises the epitome of minimalistic elegance - it is classy without being fussy, and can be very feminine or toughened up. And I think that this look is probably the makeup equivalent - easy to throw on, classic yet versatile, and it instantly glams up any outfit without looking "overdone".
If you haven't seen it yet, definitely google it. I also highly recommend checking out Ruth Crilly from A Model Recommends video on how she recreates this look - you can find it here - or Lily Pebbles video on the same - here. Both ladies were lucky enough to be invited to a special Burberry event to preview the makeup, and their videos make recreating the look a cinch. The videos are also where you can find the exact makeup products used in the actual show.
I love the look, but unfortunately my budget doesn't quite stretch to Burberry, so I wanted to try to recreate something similar with products I already had, or which were more readily available on the high street. So I scoured my makeup collection, swatching everything I thought might work, and managed to come up with this look, which I am very happy with.
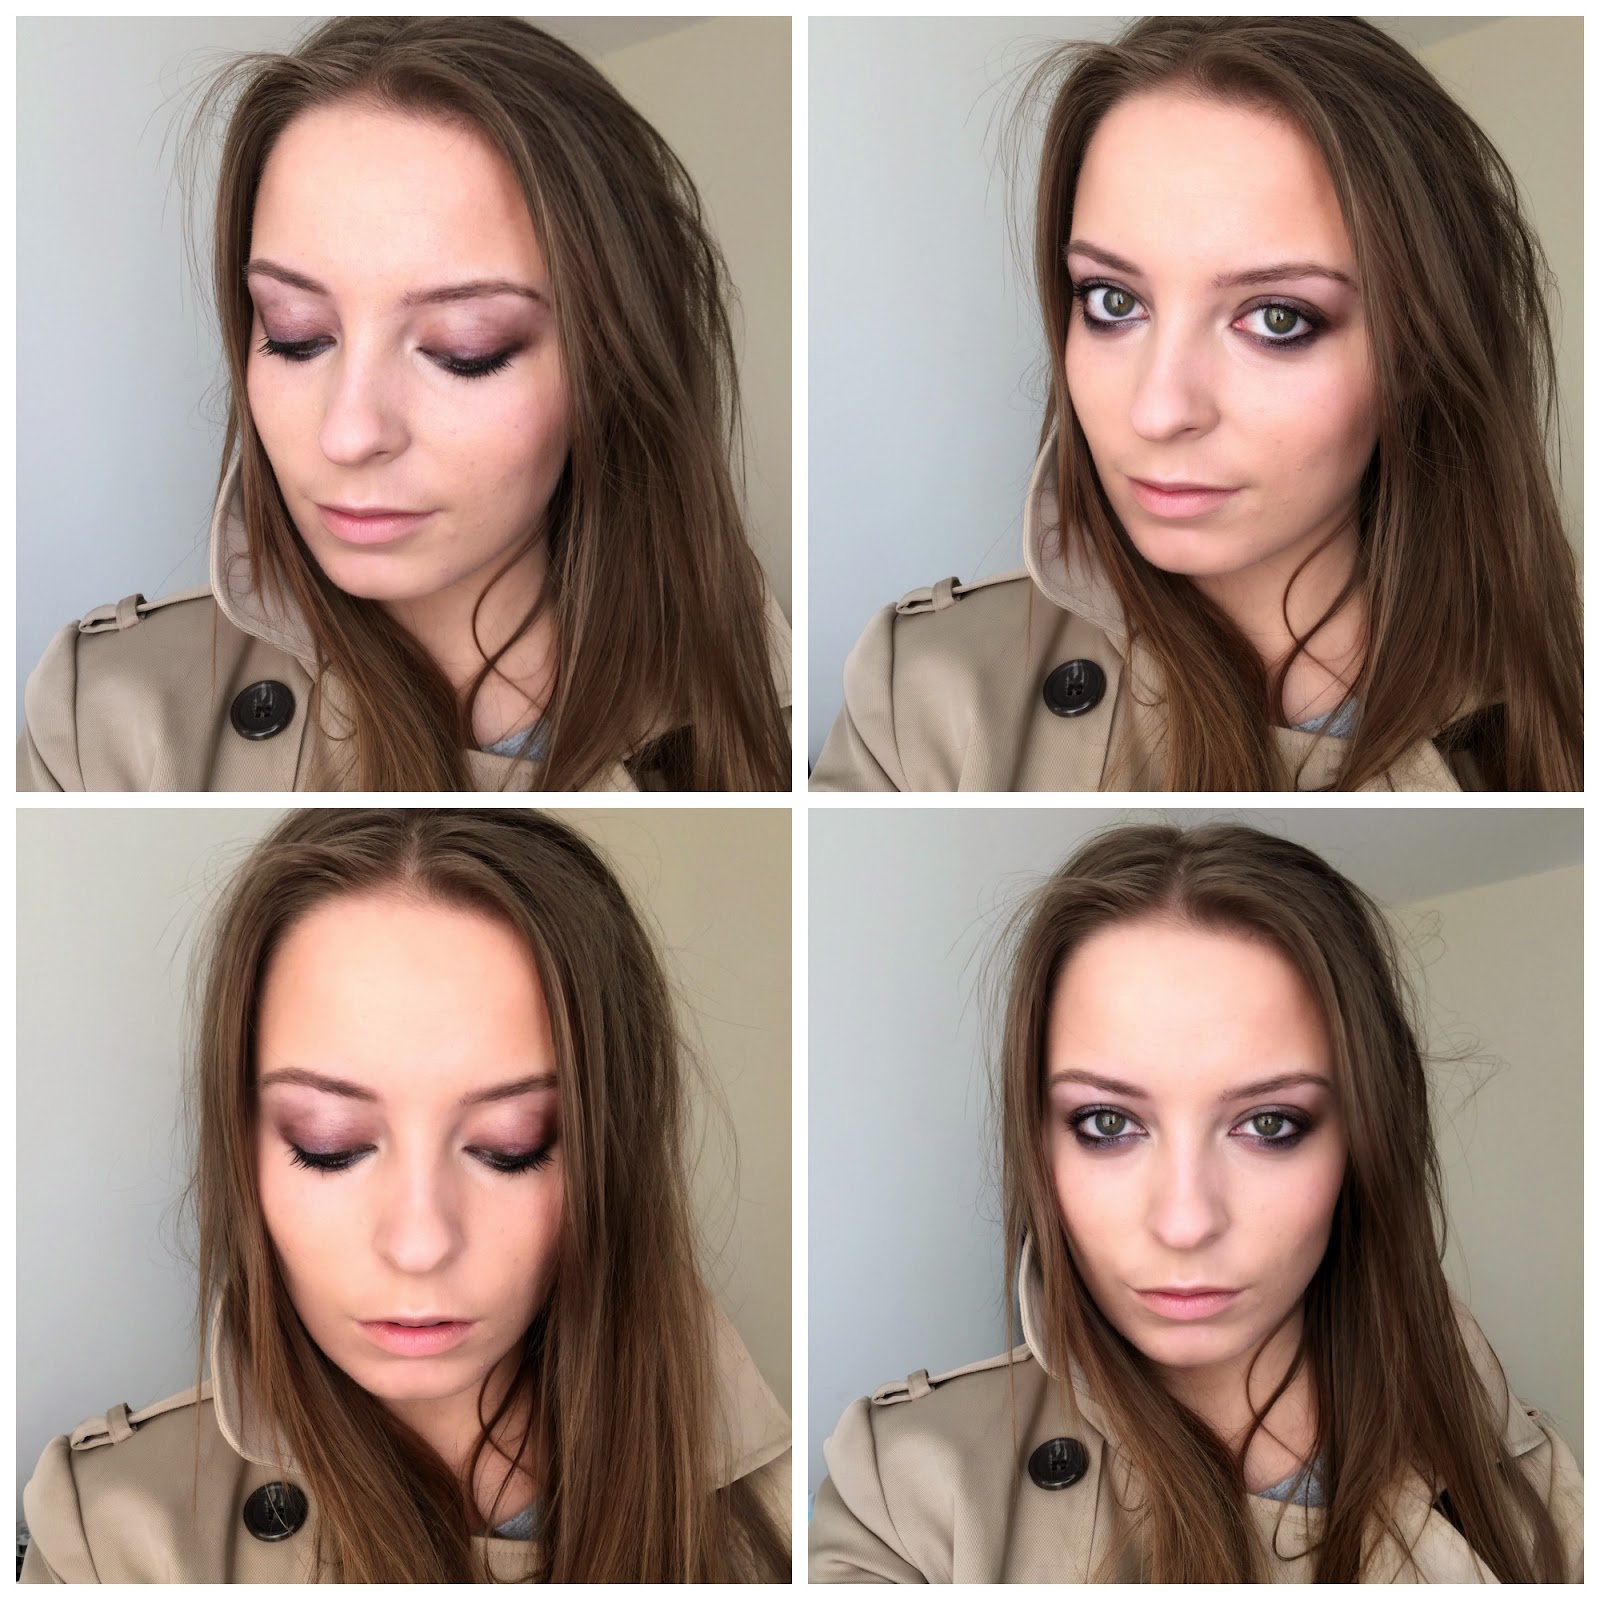
The Eyes
I (liberally) applied the Bourjois Queen Attitude Kohl Kajal along my upper and lower lashlines, and also in my waterline. I then blended/smudged it out with a stiff blending brush. I chose this as it is kohl rather than a black eyeliner; this means it is very pigmented, but also easy to blend and smudge. You want most of the colour to be right at the lash line, so don't blend it away too much, but you also don't want any harsh lines. Also, make sure you take the liner slightly lower than you think you should on your lower lash line, as this is really what creates the smoky, hazy look.
Then I mixed some of Seventeen's Instant Glow Skin Wow Tan with a matte black eyeshadow from this MUA Ever After Matte palette. I mixed it on the back of my hand and just used my finger to apply to my lids, blending out the edges with a fluffy brush. This concoction created a wonderfully glossy, sheer cream shadow, which almost had a wet look to it. Just a note on this though - I would definitely advise applying a lid primer underneath, as I found that this did crease on me after a short while.

If you don't want the mess of mixing the highlighter with powder eyeshadow, I found a couple of other products that do a very similar job without the mixing. I found that blending out a light application of my Clinique Chubby Stick for Eyes in 03 Fuller Fudge, or my Barbara Daly for Tesco cream eyeshadow stick in Bronze Gold (both reviewed here) gave a very similar look on the lids. Also, Club eyeshadow from Mac (one of my all time favourite eyeshadows) when lightly applied and blended well, gives a lovely iridescent sheen, and provides the subtly smoky haze this look requires.
I finished off with a touch of Maybelline Lash Sensational mascara - you don't want super volumised lashes for this look, and definitely no falsies, but this gives an excellent curl and is great for adding length to your lashes.
As opposed to traditional smoky eyes, where the darkest shades are blended in the outer corner and the crease, the key to this look is that the darkness should be concentrated in the lash line only. The lids should just have a wash of smoky colour, creating a hazy effect.
The Face
The skin for this look is very natural, dewy and warm. I opted for my favourite BB Cream from Garnier, for a natural coverage and finish. I would say this actually has light coverage similar to a foundation, which is great for a BB Cream, and it also comes in two formulations for dry and oily skins. I used Mac's Mineralize Concealer to perfect my skin, applying it under my eyes, around my nose and on a couple of blemishes I have on my chin (overshare!).

I then added some contouring and bronzing to warm up the skin and give my face dimension, using Bourjois Delice de Poudre bronzer. Melba by Mac provides the perfect warm, peachy neutral blush - I would avoid pink blushes for this look, and go for a more neutral, browny peach tone. A dewy highlight comes courtesy of Seventeen's Skin Wow 3 Way Highlighter - I dabbed this on my cheekbones, down the centre of my nose, and on my cupids bow for naturally glowing skin.
And finally, for the finishing touch on the lips, you want to go for a neutral nude lipstick, which isn't too glossy. I used Mabelline's Colour Sensational Lipstick in Tantalizing Taupe.
So, there you have it - I hope you like it, or find it useful! I have been wearing this look (and my trench coat - sadly not Burberry!) a lot lately, as it's really easy to do, but still makes an impact.
Let me know what you think!

**Disclaimer: all products featured here were purchased by me, and all opinions are my own. This is not an affiliate post, I was not paid for this review. Any links contained here are not affiliate links. The photographs used in this post are my own. Please see my Disclaimer page for full deets on all the boring stuff**

This eye look is AMAZING! I saw your blog post link on Twitter and I was so happy to see that it was a look post. Agreed that Burberry's collections are beyond stunning but a bit out of the price range, this is a gorgeous look for Autumn :)
ReplyDeleteMAKE IT RAYNE
XX
Thank you SO much! I'm so pleased you like it! Yep I agree - I am definitely going to be rocking this look for a long time to come! :) X
Delete